Getting Started with WhatsApp
Deploy your AI Agent on WhatsApp, the world’s most popular messaging platform with over 2 billion users. Your customers can engage with your business through natural conversations on their preferred channel.
Why WhatsApp?
- Familiar Platform - Customers already use WhatsApp daily
- High Engagement - 98% open rate compared to 20% for email
- Rich Media - Share images, documents, location, and more
- Global Reach - Available in 180+ countries
- Business Features - Verified business profile and official API
Prerequisites
Before you begin, you’ll need:
- A LiveTok account (sign up at livetok.ai)
- A phone number for your WhatsApp Business account (you can use an existing one or get a new one)
Part 1: Creating Your AI Agent
Step 1: Create Your LiveTok Account
- Visit livetok.ai
- Click “Get Started” or “Sign Up”
- Complete the registration process
- Verify your email address
Step 2: Configure Your AI Agent
Configure your AI Agent’s personality and behavior:
Basic Settings
-
Language - Select primary language (supports 25+ languages)
Learn more about available languages and voice options: Voices & Languages
-
Instructions - Define how your agent communicates, its personality, and behavior. You can specify:
- Tone (Professional, Friendly, Casual)
- What the agent should and shouldn’t do
- How to handle specific scenarios
- Custom guidelines for your business
Example Instructions:
You are Alex, a friendly AI assistant for [Your Business].
Always greet customers warmly and be helpful.
Keep responses concise and clear.
If you can't answer a question, offer to connect them with a team member.
Learn more about writing effective instructions: Agent Instructions
For more advanced configuration options, visit the Agent Configuration documentation.
Step 3: Add Integrations (Optional)
Integrations allow your AI Agent to connect with external tools and services, enabling it to perform actions like scheduling appointments, accessing customer data from your CRM, managing e-commerce orders, and much more. By integrating with platforms you already use, your agent can provide more personalized and actionable responses to your customers.
To learn more about available integrations and how to set them up, visit the Integrations documentation.
Part 2: Connecting WhatsApp
Now that your AI Agent is configured, let’s connect it to WhatsApp. You can connect WhatsApp whether you already have a WhatsApp Business account and are using the App, or if you don’t have one yet and want to enable LiveTok on a new number.
Setup Steps
- Log in to your LiveTok dashboard
- Navigate to Channels in the sidebar
- Click Add Channel
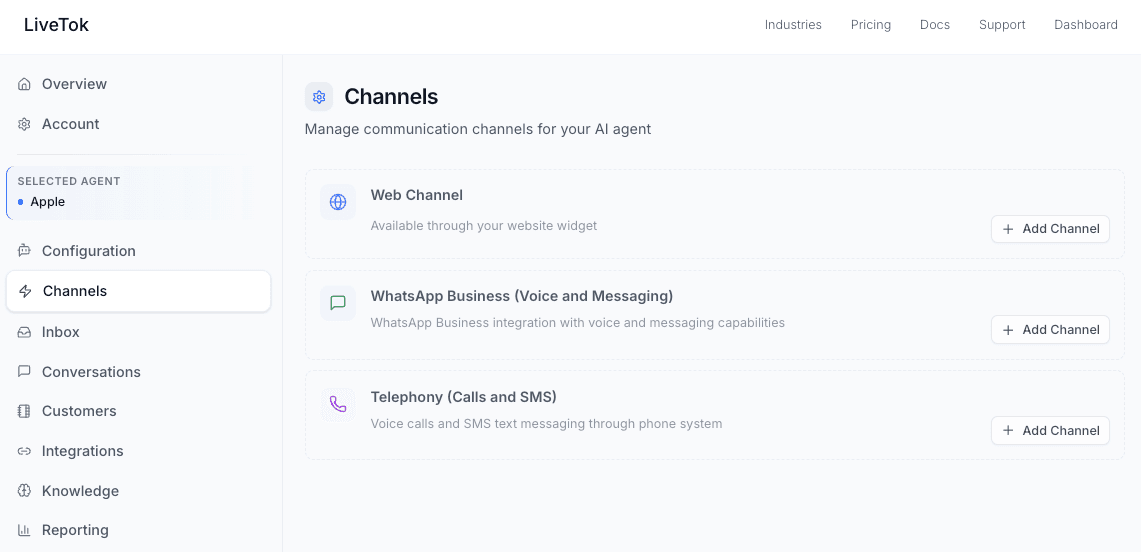
- Select WhatsApp from the channel options
- Choose your setup option:
- Connect Existing WhatsApp Business Account - If you already use WhatsApp Business
- Create New WhatsApp Business Account - If you’re setting up a new number
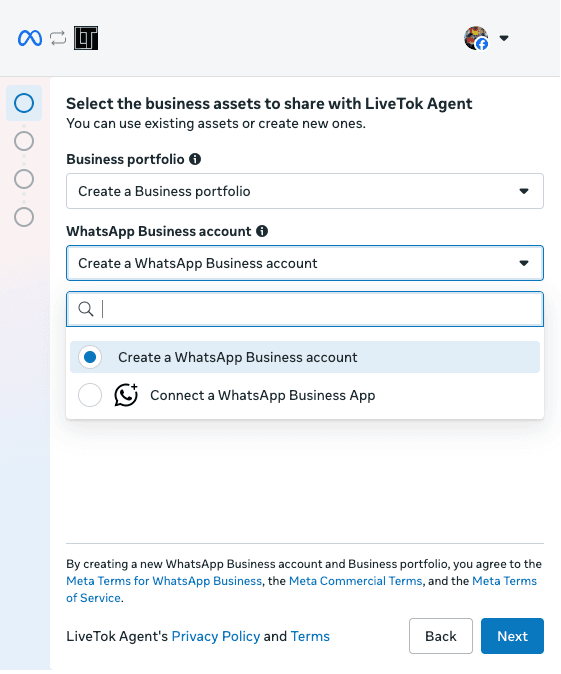
- Follow the setup wizard:
- If connecting an existing account: Log in with your Facebook Business Manager credentials, select your WhatsApp Business account, and authorize LiveTok
- If creating a new account: Provide your business name, category, description, and phone number
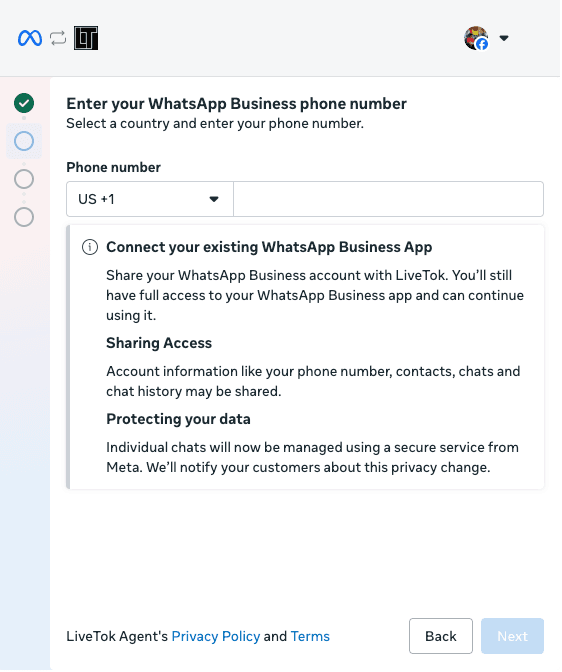
- Verify your phone number via SMS or call
- Complete the Meta Business verification process (if required)
- Wait for approval (typically 1-2 business days for new accounts)
Important Notes
- You must have admin access to your Facebook Business Manager account (for existing accounts)
Troubleshooting
Agent Not Responding
- Verify WhatsApp connection is active
- Check if agent is enabled
- Ensure phone number verification is complete
Integration Issues
- Confirm integration credentials are valid
- Check API key permissions
- Review integration logs in settings
Message Delivery Failures
- Verify WhatsApp Business account is in good standing
- Check message template approval status
- Ensure compliance with WhatsApp policies
Next Steps
Need Help?
Contact our support team or check our Developer Documentation for advanced configuration options.